This The House of Tesla Chapter 4 Walkthrough covers every step—from the white door circuit and lab machines to the cage control grids, boat/fountain puzzles, office safe, robot arms, gas lines, and the final power route. Follow along to reach the chapter’s end cleanly and fast.
The House of Tesla Chapter 4 Full Walkthrough
1) White Door Circuit (Entrance Puzzle)
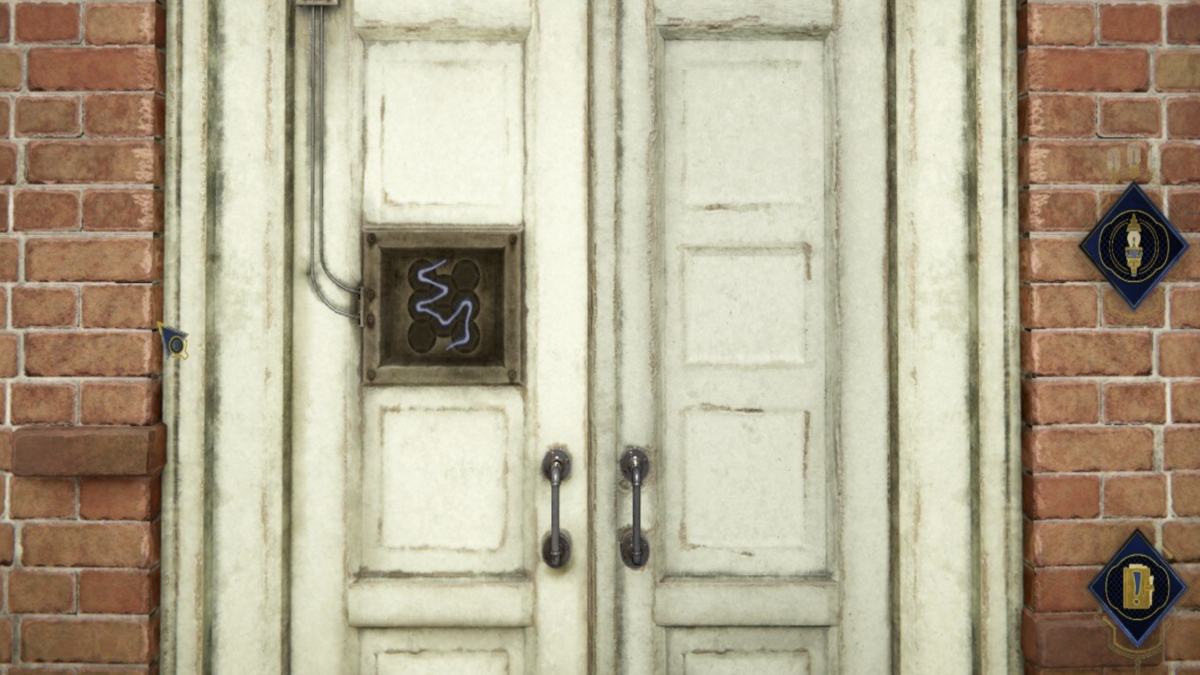
- At the white door with discs, connect the bottom wire to the top to close the circuit.
- Activate the Prototype to view power lines and align small wires using the adjacent rotating circles.
- Match the alignment (per your reference image). The white door opens.
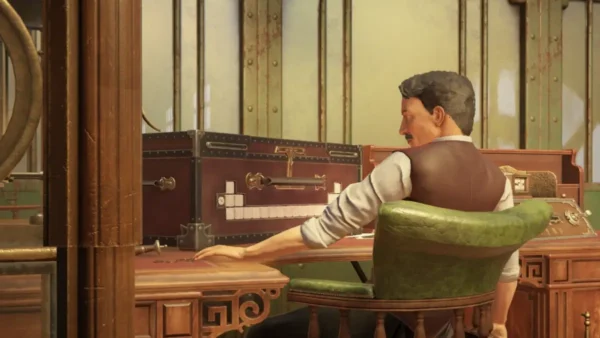
2) Lab Desk – Folded Component → Unfolded Component
- Inside, grab the lore paper on the desk (far-left corner).
- On the small table to the right, slide down the left screw to eject a part—pick up Folded Component.
- In inventory, press the three tabs (top) and pull out the arms around the red button to create Unfolded Component.
- At the main desk center, insert Unfolded Component in one of the three slots.
- Press its button once (arms extend but do nothing). Slide the two bars beneath the arms up, then press the button again to grasp.
- Pull the red cable down to open the bottom door; take the Cylindrical Device.
3) Cylindrical Device & Drawer – Pathing Puzzle
- On the small table’s round gold circle (with holes), open the Cylindrical Device in inventory and raise/retract its pins to match the face pattern.
- Place it on the circle and spin to open the drawer; take Metal Door With a Switch.
- At the main disk (where you took the cylinder), fit the Metal Door With a Switch into the open bay, then drag the upper device down.
- Flip the red switch to start the pathing machine. Cover arrows with red boards to route the mover out the top-right:
- Column 1: cover top arrow
- Column 2: cover middle
- Column 3: cover middle
- Column 4: cover bottom
- The mover docks to the black box on the desk.
4) Generate a Spark & Build the Coil Square
- Turn the small-table device to face the desk device.
- Under the center desk, press the lightning button to release the Coil; pick it up.
- Exit the area and go left to the green barrier with circular nodes. Attach the Coil.
- Rotate coils so the white lines form a square; five squares pop out of the barrier.
- Press the five squares bottom → top. A book loosens; grab Ornamental Wing.
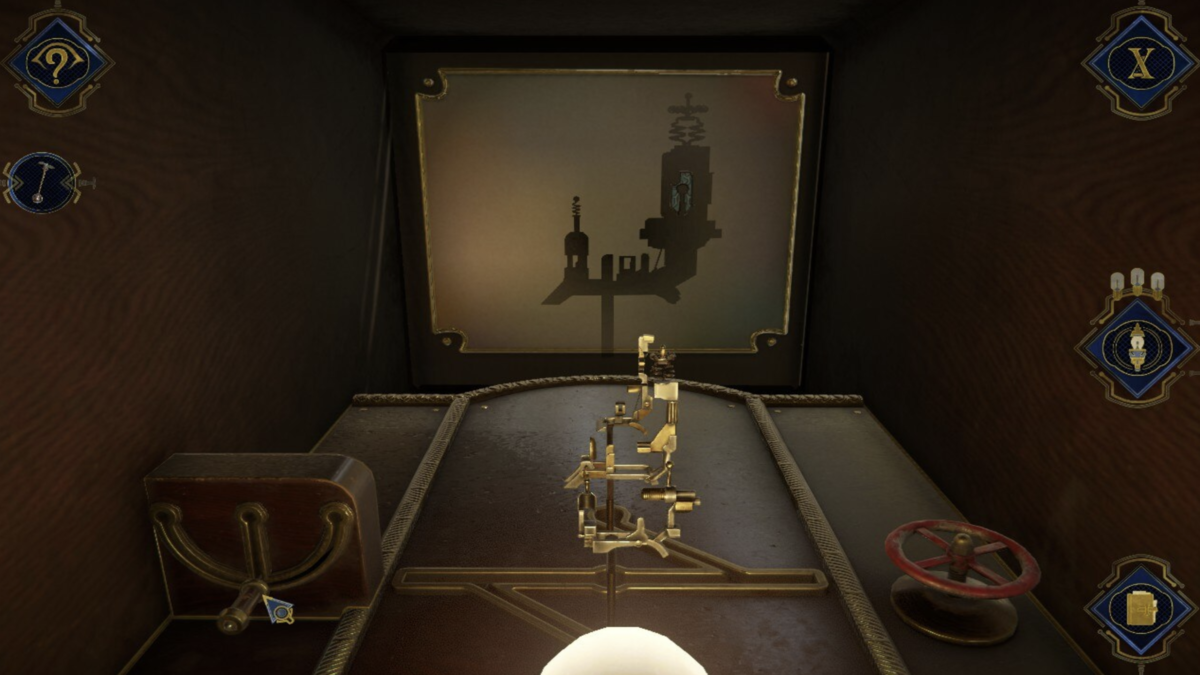
5) Column, Tower & Sphere → Stairs
- Place Ornamental Wing on the nearby wooden column, slide it down—the distant tower straightens.
- At the tower base, take the Metal Sphere.
- Place the Metal Sphere into the column slot; the green barrier drops and stairs complete.
- Ascend and interact with the memory; choose Test the prototype.
6) Transmitters (Memory Machine)
- Collect all Transmitter parts from the right-hand table.
- First Transmitter: insert; move shapes along outer rings to respect the inner border; slide shapes to the perimeter slots when aligned.
- Second Transmitter: check the back panel imprint; rotate two rings to form a fan shape, then insert and align.
- Third Transmitter: repeat alignment to match its back imprint, then arrange colored shapes to the final configuration (per your reference image).
- After the scene, grab both papers on the punch-card machine and take the Brass Key.
7) Cage Panel – Disk Latch & Dual Grid Mazes
- Unlock the cage with the Brass Key; look at the lower control cover.
- Slowly rotate/pull the bar so its protrusions pass through the disk to open the cover.
- Use the joystick to route the red wire and light bulbs, exiting at the specified corners:
- Grid 1 (exit bottom-right): Left×3 → Down×1 → Right×1 → Down×1 → Right×2 → Down×1
- Grid 2 (exit top-right, light all): Right×1 → Up×3 → Right×1 → Down×3 → Right×2 → Up×3 → Right×1
8) Direct the Charge & Medallion Door
- Pull the nearby lever to close the cage—electric arcs start but fall short.
- Use the left slider on the cage panel to push the skyscraper toward the window, pull the lever again—the charge now reaches the globe.
- Downstairs at the globe, take the Medallion from the opened door.
- At the staircase near the lab set, insert the Medallion and pull both arrows—a new barrier/puzzle appears.
- Spin a gold piece, then press the button to send it to the center. Arrange all pieces so they connect when centered. Barrier drops; go upstairs.
9) Book Tile & Cross-Base Knob
- On the left ledge, grab the paper and L-Shaped Grooved Tile.
- At the open book, slide wood pieces to make space, fit the L-tile, then slide the knob down to collect Cross-Base Knob.
10) Full Power Route to the Glass Door
- Back in the cage room, install Cross-Base Knob into the middle slider and push toward the window; pull the lever to send charge.
- Downstairs, inspect the struck skyscraper: rotate the side circles to align the two inner spheres (top-right side → top middle; bottom-right side → bottom middle). A tray opens—take Mechanical Plaque.
11) Silo Loader – Retrieve the Boat
- Upstairs (past lab), insert Mechanical Plaque into the podium with red wheel.
- At the nearby control panel, use direction buttons (move loader), the left lever (rotate silo 180°), and the big button (grab/release). Input to fetch the ship:
- Right → lever right → Left → lever left → Up → Grab
- Down → Left → Up → Right → lever right → Right → Down → Release
The boat drops into the water.
12) Boat Steering & I-Tile
- Return to the red wheel podium to steer the boat. Sail through all buoys so every beacon lights—route is shown on the Mechanical Plaque.
- The fountain platform extends and a door opens at boat controls—take I-Shaped Grooved Tile.
- At the book, rearrange wood so the I-tile fits above the tile with the circle. Drop the circle piece to remove the knob. You’ll keep the I-tile and circle piece on the right.
13) Third Slider Charge & Locked Door
- Install the freed knob in the third slider. Push the first & second sliders fully down, the third fully forward. Pull the switch to send power to the green-trim door between staircases and unlock the viewing machine.
- Enter the newly opened door to the fountain room on ground level.
14) Fountain Hatch – Picture & Valves
- On the extended platform, solve the scrambled picture on the hatch using the three wheels; align to the silhouette. Water flows behind the tank.
- Close the correct valves so the tank fills completely: turn valves 2, 3, and 5 (left→right).
15) Boat Hull Antennas & Propeller Shaft
- Right of the fountain, at the pipe opening, remove the two metal plates using the three antennas and tabs (follow your sequence).
- Open the lower compartment; take Propeller Shaft.
16) Shadow Booth (Light Bulb) & Shaft Pedestal
- In the main hall, at the green curtain booth, select each part with the left lever, rotate with the right wheel to match the silhouette. Receive Light Bulb.
- A small column rises—insert the Propeller Shaft at the top.
17) Office – Safe, Constellations & Triangle-Base Key
- Use sliders to route the charge so it unlocks the office door (green trim/glass). Enter.
- At the safe: insert Light Bulb into the top port.
- On the safe face, count shapes and set dots: Triangle = 3, Square = 5, Circle = 4 → safe opens. Take Left Panel.
- Rotate the inner disc to form initials, then exit the safe for now.
- At the desk armillary, rotate rings so constellations align and sit on the horizontal band → take Large Ring.
- On the right, place constellation symbols onto their correct background shapes (e.g., Leo bottom-left; Aquila top-right of top-middle star). A secret opens—take Right Panel.
- Make sure to make all parts of the armillary sphere move at the same time to earn the And Yet It Moves achievement.
- On the green model, insert Left Panel and Right Panel. Arrange the three pieces to mirror the model left of the desk; a footwell compartment opens.
- Pull together the two ornament halves to lift the desktop and reveal books.
- Note book numbers. Press the button to slide out book 9 and turn it to a 6.
- Spin the three circle dials in the order that matches the indicated book: middle → top → bottom. The spine opens—take Triangle-Base Key.
- Back to the safe, use Triangle-Base Key to drop stairs. Go up and enter the room on the left for the next memory—choose Reason.
18) Robot Strip Puzzle, Power Node & Metal Clamp
- Solve the robot strip/pin puzzle (move strips/pins in the sequence given; snap each pin in).
- Slide the second strip from the top to the right—do not snap its pin yet (leave it one notch short).
- Move the third strip from the top (the one directly below it) to the left so it’s free from the strip above.
- Now slide the second strip the final notch to snap its pin into place.
- Move the third strip from the top all the way left.
- Slide the bottom strip all the way left and lock its pin.
- Move the third strip back to the right until its pin locks.
- Finally, slide the top strip to the left until its pin snaps into place.
- Leave this room, go to the big glass case area. Use Prototype: create a power node by sending an electronic component through the suction pipe (far-right opening). Drag power between orbs to energize the mechanical arm.
- Use the square arm to arrange tanks/test tubes per your reference to connect top tank → middle test tube.
- In the workshop (second memory room), solve the robotic hand: move cylinders via the adjustable groove and toggle the right switch to connect all five strips:
- Strip1: Leftmost
- Strip2: Only groove
- Strip3: Rightmost
- Strip4: Leftmost
- Strip5: Only groove
- Flip the switch and pull the telescopic handle left to open the grip. Take Metal Clamp.
19) Cart Clamp → Test Tube → Cross-Base Key & Switch
- At the green podium steering wheel, drive the little cart to the far left so a door opens. Install Metal Clamp on the cart.
- Drive to the Test Tube, grab it, return to the door to collect Test Tube.
- On the downstairs table left of the safe, insert the missing Test Tube and flip the switch; take Cross-Base Key.
- In the safe, use Cross-Base Key to eject a Switch.
- Upstairs, fit the Switch on the robot’s arm and repeat a shorter strip puzzle to free the Metal Pigeon:
- Strip1: Leftmost
- Strip2: Middle
- Strip3: Only groove
- Strip4: Leftmost
- Strip5: Only groove
- Take Metal Pigeon; open it in inventory (wings/lever/legs) to make Winged Metal Pigeon.
20) Ring Maze, Electrodes & Neon Tubes
- Downstairs, perch the Winged Metal Pigeon in front of the circular device (right of the main desk). Four doors open.
- Place the Large Ring onto the circular maze. Move the top cursor along tracks to the center—remember: you can’t move the ring while the cursor sits on it.
- Collect Electrodes. In the upstairs glass-case room, load them onto the cart and place them into the round device (upper-right).
- Power the switch board: use Prototype to pull the left suction node → middle tube, then draw power from the switch orb all the way left to the other tube until all tubes glow. Flip the switch; the panel expands.
- Use the mechanical arm to route glowing gases into the test-tube rack below, matching colors to painted lines (watch the copper tubing).
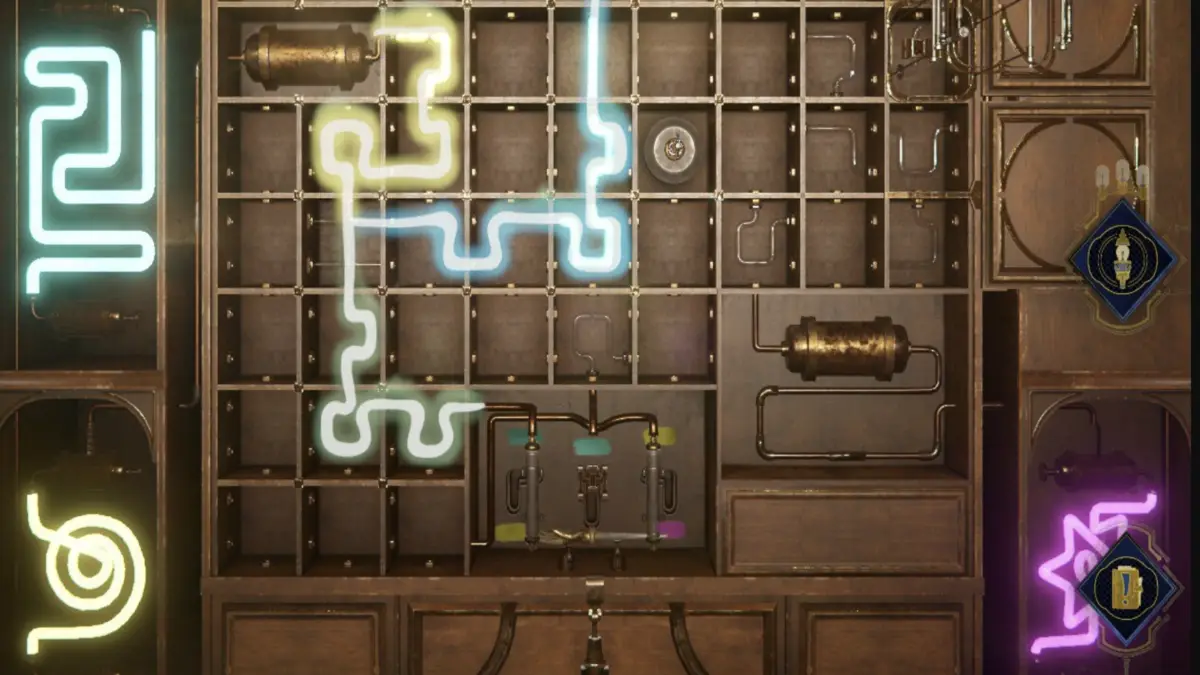
- Combine Yellow + Blue = Green using the above picture.
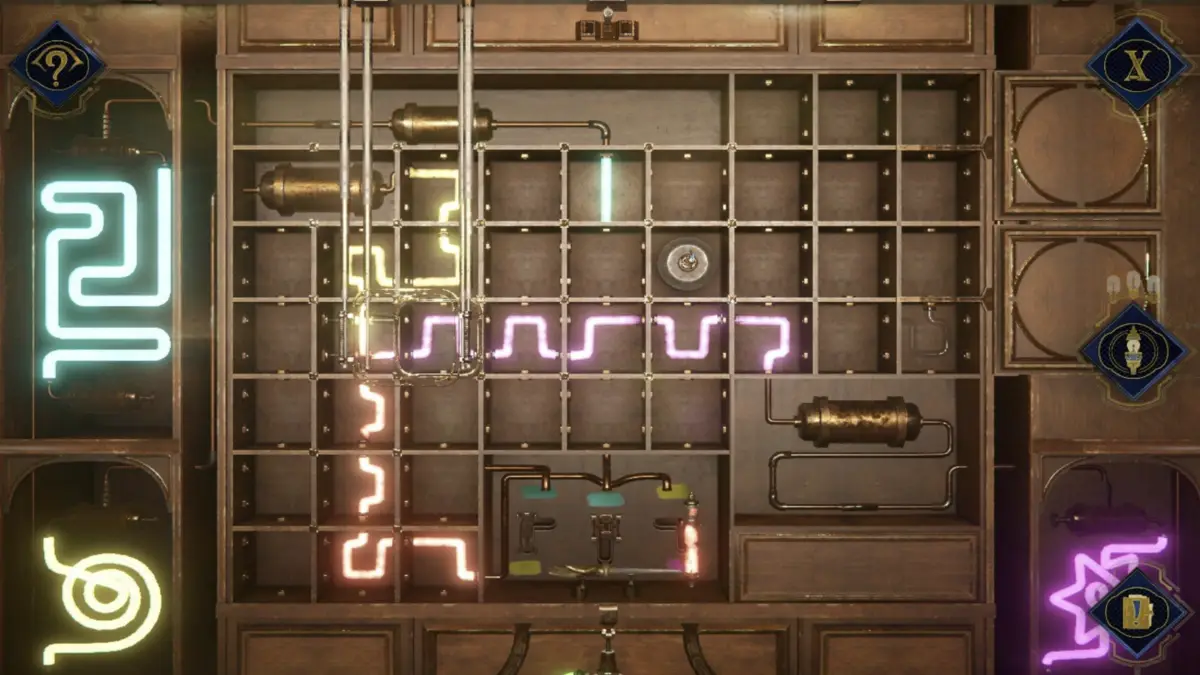
- Combine Yellow + Pink = Orange per path.
- A Brass Hand extends—collect it with the cart.
21) Final Charge & Exit
- Downstairs, at the green podium by the stairs, first restore power from the upstairs suction tubes back toward the safe (right → left), then to the podium (use Prototype to connect orbs by shelving).
- Place the Brass Hand on the podium and pull it right to lower the stairs. Chapter 4 complete!
Outro
That completes our The House of Tesla Chapter 4 Walkthrough! You’ve solved intricate lab puzzles, powered colossal machinery, unlocked Tesla’s safe, and pieced together the robot’s mysteries. But the story isn’t over yet—the challenges only grow more complex from here. Continue your journey in our The House of Tesla Chapter 5 Walkthrough and see what awaits in the next chapter. Otherwise, check out our The House of Tesla hub for more guides!