This House of Tesla Chapter 2 Walkthrough guides you through every puzzle without spoiling the magic up front. From freeing the crank and powering the conveyor to welding key parts, solving the eight-bulb door, and syncing the statue and camera contraptions, we’ll take you step-by-step so you can keep momentum and enjoy the reveals. Use this House of Tesla Chapter 2 Walkthrough as your companion piece to Chapter 1.
The House of Tesla Chapter 2 Full Walkthrough
1) Free the Metal Crank & Lower the First Stairs
- Zoom in and flip the Metal Crank to the right to trigger a cutscene.
- Re-zoom the podium. On the top panel, find the Screw and spin it left to remove the upper cover.
- Flip the Switch inside to release the Metal Crank; collect it.
- Back out, look left to the tall box. Insert the Metal Crank, spin to lower the stairs and open the gate. Zoom the stairs to move down.
- Turn around, take the Broken Gear Holder from the crank device.
2) Balance the Meter & Repair the Gear Cover
- Face the device with two wheels and a center meter.
- Turn left wheel until yellow hits the 3rd tick.
- Turn right wheel until yellow hits the 2nd tick. The meter turns green and powers the right mechanism.
- Use the new handle to lower the glass case.
- Place the Broken Gear Holder into the exposed bay.
- To the right, unlatch the small shelf, flip it open to reveal ↓/↑ buttons.
- Press: Down, Up, Down, Down, then the green button.
- Press/hold red and trace the crack to weld it. Pick up the Welded Gear Holder.
3) Re-rig the Stairs & Power the Conveyor/Elevator
- Return to the crank machine. Zoom the red gear and insert the Welded Gear Holder.
- Back out once, spin the Metal Crank to slide the upper stairs to the next level (don’t descend yet).
- Activate the Prototype (blue lines).
- Zoom into the blue pipes by the conveyor:
- Drag power from the bottom orb → orb above the conveyor to start it.
- Drag conveyor orb → item at belt end.
- Drag that orb → far-left elevator orb to power the elevator.
4) Drop & Strip the Elevator Sheave
- Go down the stairs, approach the elevator.
- At the elevator front, remove the metal wedge so the car drops to the next level.
- On top, unscrew the Knob Screw to collect it.
- Slide the green/gold cover aside, take the Cracked Sheave.
5) Weld the Sheave & Restore the Elevator
- Back to the Welding Machine: place Cracked Sheave on the platform.
- Set arrow route: Down, Up, Up, Down, Up, Up, Down, Down, then press green.
- Hold red and trace to weld. Take Welded Sheave.
- Return to the elevator: install Welded Sheave, close door, reinstall Knob Screw (spin right to lock).
- Press the elevator button to raise it, enter, and select Floor 3 (you’re on Floor 2).
6) Paper Clue, Hollow Corkscrew & Lightbulb
- Exit to the platform on Floor 3.
- Read the paper on the wooden box (updates log).
- Open the wooden crate (latch → lid) and collect Hollow Corkscrew.
- Back into the elevator: attach Hollow Corkscrew to the flickering top light, spin left to remove, then take the Lightbulb from the socket.
7) Eight-Bulb Lock (Door Puzzle)
- Exit to the locked door; insert the Lightbulb into the empty socket.
- Number bulbs 1–8 clockwise (top = 1; position 8 is the one you placed).
- Press bulbs in this order to open:
1, 3, 5, 7, 8, 2, 3, 6, 2, 3, 4, 2.
8) Memory, Briefcase, Train & Roof Sliders
- Inside, interact with the memory (choose Amendments → Project).
- Take the Tower-Shaped Key from the desk.
- Insert key into the briefcase crest, spin to unlock, lift the lid. An Ornamental Tile drops—pick it up.
- Take the Golden Beam from the top compartment.
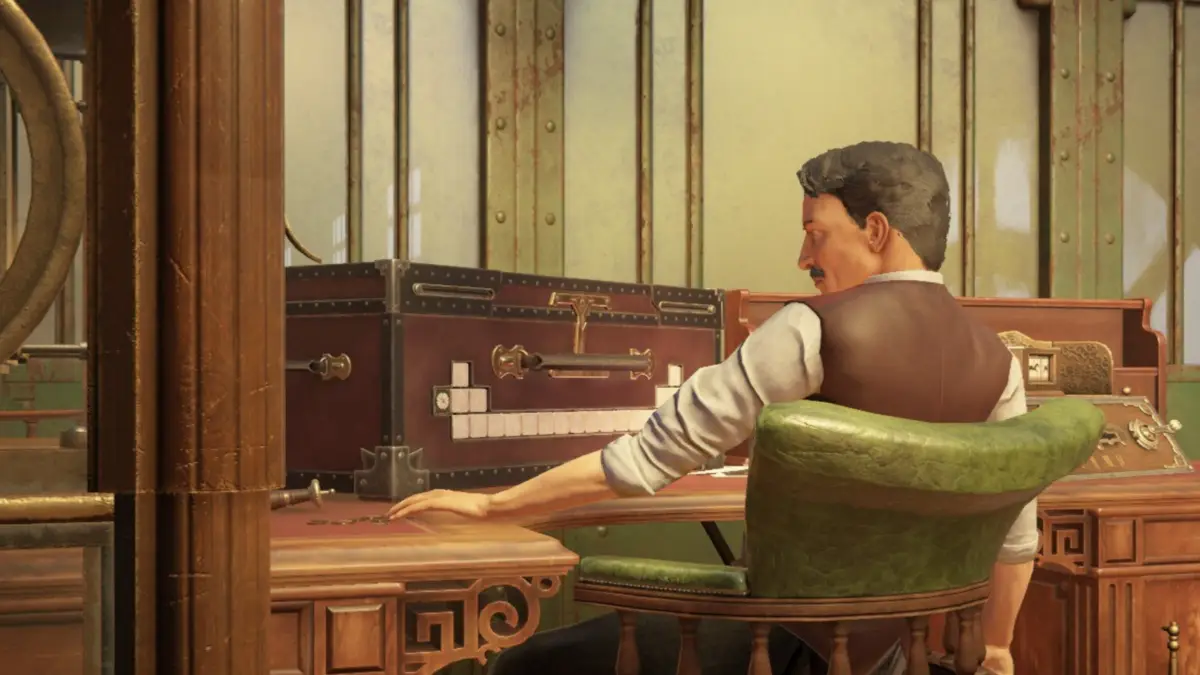
- On the briefcase front, slide white tiles left until you reveal a Model Train; collect it.
- On the top tracks, place the Model Train between the barriers—right barrier raises.
- Drag the train right to raise the house model.
- Zoom the house; insert Golden Beam above the door to unlock the green roof.
- Slide the green roof right to reveal the square hole and side window sliders.
- Set slider notches (top=1 to bottom=4), left→right: 4, 1, 2, 3.
- Match the back of the Ornamental Tile; when the center shape lights, insert the tile. The briefcase platform rises, revealing left/right puzzles.
9) Right Puzzle – Star Grid (Turquoise & Blue)
Use the diagonal arrow controls; moving a star rotates the grid 90°. Do these moves:
T-Up → T-Right → T-Right → T-Right → T-Down → T-Right → T-Down → B-Down → T-Down → B-Left → T-Right.
The left panel opens—take the Tower Model.
Open it in inventory and extend/center pieces to form the Erected Tower Model.
Place it in the roof slot to raise both track barriers, then slide the train left to raise the lighthouse-like platform.
Collect the Small Key from the lighthouse.
10) Clock Puzzle & Wire Dome
- Zoom the clock on the left of the case; insert Small Key.
- Set ring sliders:
- Top slider = 2nd turquoise mark from top.
- Bottom slider = 2nd turquoise mark from bottom.
- Spin key until both hands at 12. Slide clock face left; take Wire Dome.
- Place Wire Dome atop the lighthouse. Cutscene—choose Anger.
11) Book Ramps, Marbles & Cylinder
- At the tall book tower, open the left rectangle door.
- Pull the far-right red book and drag it in front of the far-left book to align the ramp; marble rolls.
- Back out once, open the front rectangle door. Move books to align ramps (slots 1–5, left→right):
- 1 → 5
- 1 → 4
- 2 → 3
- 1 → 2
- The glass case on the first shelf lowers.
- Spin the handle inside to open and collect Crank and Segmented Cylinder.
12) Columbus Table – Symbols, Tablet & Compass
- At the blue table with glass dome, read The Feat of Columbus.
- Left leg: insert Crank, spin to open side drawer (sliding wood squares). Back out for now.
- Right side rollers (1–6 left→right) should show: —, Crown, —, Cross, Gryphon, —.
- Return to left symbols; slide down 2, 5, 6 to match. The far-right compartment opens—turn the screw to get Wooden Tablet (Castle).
- Front of table: place the Wooden Tablet in the missing slot; cover drops to reveal a Compass.
- Slide direction tokens to correct positions:
- NW → between N and W
- SE → between S and E
- SW → between S and W
- The compass opens; take Push Button.
- Top of table: insert Push Button at the missing spot.
- Spin the egg by pressing Button 3 → Button 4 (timed). The egg pops; the jar swings open. Collect the Shot Glass.
- In the U-shaped table room, read the paper (updates book).
- Shot-glass altar:
- Move waves glass (from red-orb slot) to the far left waves slot—take the note from the box that opens.
- Place red glass at red orb; square glass to square slot.
- Move whale tail to far-left blank; door to far-right blank—open the red container and take Pipe Wrench.
- (Optional for achievement) Move waves and red to the blank extremes to open far-left container (empty).
13) Valve 2, Hip Flask & Face Mechanism
- Inspect the valve left of the wall statue—note the number 2.
- In inventory, expand Pipe Wrench to size 2.
- Use it on the valve bolt; unscrew to collect Pipe Wrench (reset) and Valve.
- Swing open the valve door; slide the small latch at the tube’s bottom to drop the jar with two doves. Take the Hip Flask.
- In the Alcove, zoom the wall face. Hang the Hip Flask between the chains, then rotate it out—mouth lowers, face rises, revealing a mechanism.
14) Globe Beam, Statue Foot & Welding the Foot
- Back at the desk, fling the compass lid aside to expose models. Remove the Golden Beam from the building.
- Above the statue, zoom the globe and insert the Golden Beam into the missing slot. The statue’s foot falls—collect the Metal Foot.
- Elevator to Floor 2; at the Welding Machine, place the Segmented Cylinder (arrows) and then the Metal Foot.
- Roller 1: Down, Up, Down, Down
- Roller 2: Up, Down, Up, Down
- Roller 3: Down, Up, Up, Down
- Press/hold Red to weld. Take Welded Metal Foot.
- Return to Floor 3; attach the Welded Metal Foot to the statue. Panels open left/right.
15) Limb Switches with Prototype
Activate the Prototype to see blue power lines, then set limb switches to touch each node:
- Right Arm: Leave as is.
- Right Leg: Bottom-left slot.
- Left Arm: Top-right slot (connects to globe).
- Left Leg: Bottom-right slot.
- A piece drops—pick up the Clock Hand.
16) Timed Door Power & Horse Pose Puzzle
- At the face mechanism in the Alcove, insert the Clock Hand.
- Open the door; turn the hand three clicks right (pointing left), press the button—this starts a timer so you can exit as the door closes, routing power outside.
- With the outside device powered (horses with green/yellow/blue frames), you must match specific poses using clues:
- Check the racehorse painting on the closed Alcove door (colors/numbers).
- Use the zoetrope on the desk (right of the model box) to dial in each pose with the right-side lever/clicks.
- Set frames to:
- Green: gallop pose (7 clicks)
- Yellow: front legs form a triangle (4 clicks)
- Blue: all legs tucked inward (5 clicks)
- Slide the green knight all the way right; the cabinet opens. Take the Foldable Mechanism.
17) Book Display – Marble Chain & Foldable Rails
- Return to the book display. In the first glass bay, note the thread with “2”; set the Pipe Wrench to size 2 in inventory.
- Before using the wrench, place the wheel (Segmented Cylinder’s wheel) on the thread, then spin toward you to advance the marble and lower the second glass case.
- In the second bay, install the Foldable Mechanism.
- Use the left and right side handles alternately to steer the green cube along rails into the red hole. The third case opens.
18) Camera Rotors – Color Tiles & BW Linkage
- At the camera in the third case, take the paper and the earring under the tube above.
- Place the earring on the statue’s right ear to drop a Lightbulb; collect it.
- Back at the camera, open the top bay to reveal colored tiles and three levers (L/M/R). Get all three lights on with these moves:
- Green → Right
- Yellow → Right
- Left lever Up
- Yellow → Right
- Middle Up
- Right Up
- Right Red → Right
- Middle Red → Left
- Right Down
- Green → Left ×2
- Right Down
- Green → Left
- Middle Up
- Right Down
- All three lights turn red; a black-and-white tile puzzle appears.
- For the B/W puzzle, link cylinders by forming identical adjacent pairs across gaps (so pulling the lever rotates all connected rotors). Use the empties to shuffle, then:
- Spin the 3rd cylinder up 1
- Move the vertical line tile to the right empty
- Move the two dots tile to the right empty
- Spin 1st & 2nd cylinders up 1 (linked)
- Spin 1st–3rd cylinders up 4 (linked)
- Pull and hold the lever through the cutscene.
19) Drawer Handle, Component & Floor-1 Power Puzzle
- Back out; take the Drawer Handle from the desk on the right.
- Bottom of the display case: attach Drawer Handle to the two holes and slide open; read the crumpled note.
- Pick up the Electronic Component from the jar with raised lid.
- Return to the elevator. Set Pipe Wrench to size 3.
- Unscrew the 3-marked bolt to the right of the elevator buttons; open the panel.
- Place the Electronic Component at the top of the circle (it will light).
- Route power so two right lights feed the bottom switch on the left:
- Top-right green ×3
- Bottom-right green ×3
- Top-right green ×4
- On the path left from the top light, tap the L-junction ×2
- Next L-junction ×3
- 3-prong below it ×1
- Bottom straight piece ×1
- Close the cover and press Floor 1.
Ready to keep the current flowing? Continue the story and tackle the next set of contraptions in our House of Tesla Chapter 3 Walkthrough. Click through to the next page when you’re set.